ShopDreamUp AI ArtDreamUp
Deviation Actions
Many of you expressed an interest in doing renders, so I thought I'd do a little tutorial on basics. Like many, I use Daz Studio, which is free but every other prop is behind a paywall. The good news is, the render engine is also free, and you can still tinker with the default figures and free props you can get here and there.
Note that I won't touch scene and lighting setup here. There are better tutorials for these, and I want to address setting that many users seem to overlook.
For some reason, the default settings don't allow GPU use for the interface. Go to edit/preferences and set "Display Optimization" to Best. I also set Hardware Anti-Aliasing to Off but it's a matter of preferences.
In the Render Settings tab/Advanced, check if all the devices are checked. You never know.
In Render Settings, turn "Spectral Rendering" on. I won't go into details but it improves renders, at the cost of rendering time.
If you DON'T want Daz to use all your CPU so you can still browse the internet, Just remove the CPU from the rendering devices: it will not contribute much to any decent GPU. Then open the task manager, and in the Details tab, right click the Daz process and click "affinity". You can then choose how many cores Daz will use on your CPU (it will still use it, just not for rendering).
1- Prepare the scene
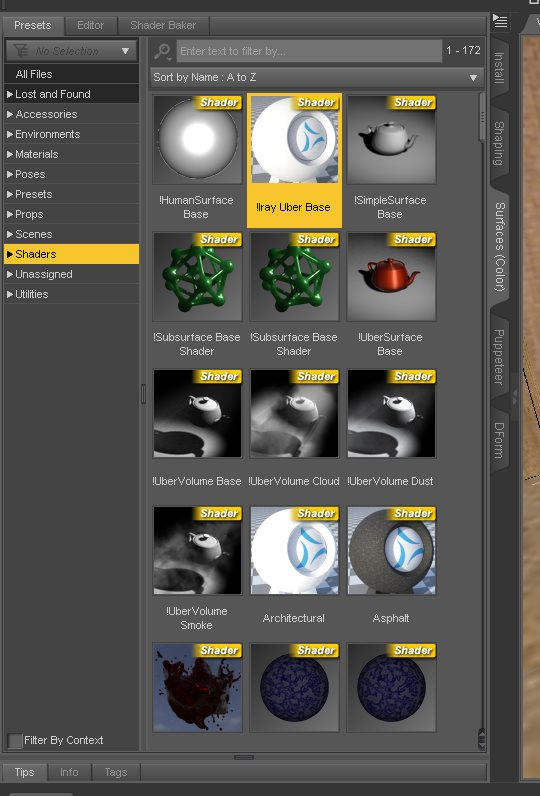
To make realistic renders, you need surfaces that reflect light. Hit Ctrl+a, then select all the surfaces in the surfaces tab editor. with these selected, double click the Iray Uber Base shader in the Presets tab Shaders:

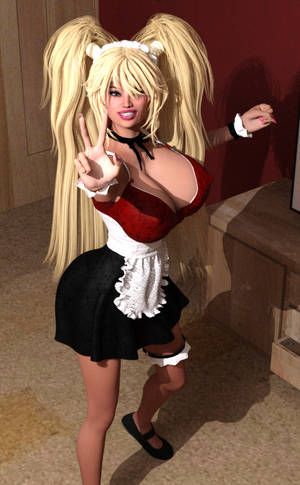
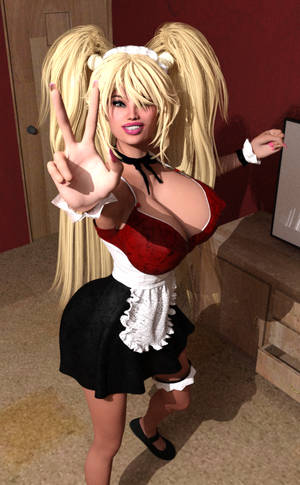
Not really a render setting, but the default camera's perspective is kinda weak. I like to make things more dramatic with a wider angle! You can either select the camera and tweak the focal length in the parameters, or simply right click/hold the zoom icon in the working view. Here's the test scene with a single pointlight and the default camera, and then a stronger perspective:
3- Add area lights with... point lights?
Yes, point lights can be used as area lights, no need to make emissive surfaces! In the pointlight's parameters, select the desired shape in Light/Light geometry. They are self-explanatory, except for the Rectangle and Disc ones which effectively turn it into a 180° spotlight along -X axis (and +X if "Two Sided" is checked). The scene gets softer shadows with a 20cm wide sphere:


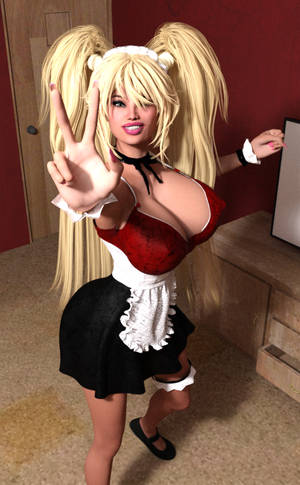
The Render Settings/Tone Mapping allow the camera to be set up as a real life camera. the default Film ISO (100) is meant for VERY bright scenes, 400 (for interiors), or 200 (for studio setups) are much more relevant for usual scenes. Here after adjusting the lighting, the difference is subtle but it usually helps to set it up right from the start:

5- After effects
In Render Settings/Filtering, you can add some post-render improvements. Bloom adds a glow around bright surfaces: the lower the "Threshold", the more of the picture will glow, while "Radius" and "Scale" determine the size and opacity of the effect. Bloom is dependent of Film ISO, so if you have to set the Threshold very high, your Film ISO is probably too low. I also lower Pixel Filter Radius to 0.5, to avoid blurring the picture. If you are rendering in a new window, you can click the left border of this window to bring up the Filtering setting, and tweak them without resetting the render:


6- Image editing
Just like a real picture, a render needs some editing to look professional. I mention it here because it means making a darker and less contrasted render than needed, so that it won't saturate, and be easier to edit. I personally use the Viveza tool in the Nik collection, which is free. If you can't/don't want to use Photoshop, it's possible to use it with Paint.net with some tweaks. In addition to usual contrast/saturation/brightness adjusting, I always do a level correction, then weak sharpening:


Feel free to suggest your own tweaks! If this was of any help, or if you just enjoy my stories, please consider supporting me on Patreon!
Note that I won't touch scene and lighting setup here. There are better tutorials for these, and I want to address setting that many users seem to overlook.
0- Basic setup
For some reason, the default settings don't allow GPU use for the interface. Go to edit/preferences and set "Display Optimization" to Best. I also set Hardware Anti-Aliasing to Off but it's a matter of preferences.
In the Render Settings tab/Advanced, check if all the devices are checked. You never know.
In Render Settings, turn "Spectral Rendering" on. I won't go into details but it improves renders, at the cost of rendering time.
If you DON'T want Daz to use all your CPU so you can still browse the internet, Just remove the CPU from the rendering devices: it will not contribute much to any decent GPU. Then open the task manager, and in the Details tab, right click the Daz process and click "affinity". You can then choose how many cores Daz will use on your CPU (it will still use it, just not for rendering).
1- Prepare the scene
To make realistic renders, you need surfaces that reflect light. Hit Ctrl+a, then select all the surfaces in the surfaces tab editor. with these selected, double click the Iray Uber Base shader in the Presets tab Shaders:


2- Crank up the camera angle
Not really a render setting, but the default camera's perspective is kinda weak. I like to make things more dramatic with a wider angle! You can either select the camera and tweak the focal length in the parameters, or simply right click/hold the zoom icon in the working view. Here's the test scene with a single pointlight and the default camera, and then a stronger perspective:


3- Add area lights with... point lights?
Yes, point lights can be used as area lights, no need to make emissive surfaces! In the pointlight's parameters, select the desired shape in Light/Light geometry. They are self-explanatory, except for the Rectangle and Disc ones which effectively turn it into a 180° spotlight along -X axis (and +X if "Two Sided" is checked). The scene gets softer shadows with a 20cm wide sphere:


4- Tone mapping
The Render Settings/Tone Mapping allow the camera to be set up as a real life camera. the default Film ISO (100) is meant for VERY bright scenes, 400 (for interiors), or 200 (for studio setups) are much more relevant for usual scenes. Here after adjusting the lighting, the difference is subtle but it usually helps to set it up right from the start:


5- After effects
In Render Settings/Filtering, you can add some post-render improvements. Bloom adds a glow around bright surfaces: the lower the "Threshold", the more of the picture will glow, while "Radius" and "Scale" determine the size and opacity of the effect. Bloom is dependent of Film ISO, so if you have to set the Threshold very high, your Film ISO is probably too low. I also lower Pixel Filter Radius to 0.5, to avoid blurring the picture. If you are rendering in a new window, you can click the left border of this window to bring up the Filtering setting, and tweak them without resetting the render:


6- Image editing
Just like a real picture, a render needs some editing to look professional. I mention it here because it means making a darker and less contrasted render than needed, so that it won't saturate, and be easier to edit. I personally use the Viveza tool in the Nik collection, which is free. If you can't/don't want to use Photoshop, it's possible to use it with Paint.net with some tweaks. In addition to usual contrast/saturation/brightness adjusting, I always do a level correction, then weak sharpening:


Feel free to suggest your own tweaks! If this was of any help, or if you just enjoy my stories, please consider supporting me on Patreon!
Year in review: 2020/2021
I missed the anniversary this summer, it's been 6 years since I started posting fetish stories here and on Patreon! Looking back at last year's post, it's also been more than a year since DA changed their UI for the worse, at least they fixed (most of) the lag. On my side, I'm jobless again, and focused on my Patreon and freelancing (and somewhat ended up with less free time). Got my two shots and I'm confused at people who protest the vaccine passport. No new paycomics, while they were fun to do, they were very time consuming and weren't worth it in the end. COMMISSIONS Slow year too on this side, stream sketches from @Sensuax , @immortaltom and @theTransformistress , colored with various levels of quality by me! ANIMATIONS So many animations. Here are the ones I can share here, the other ones are either commissions or too smutty! Still super jiggly :p . You may have noticed the uploads have slowed down on Da, I currently focus on two long stories on Patreon so I ran out
Artist spotlight: uh it actually got worse edition
Oh boy, when I wrote last year's Artist spotlight, I didn't expect 2020 to turn into a pot pourri of dystopian movie plots. Anyway, Deviantart is still my happy place at least, despite this shitty new UI (wait, are we in the bad place?), so here's all the new art: PAYCOMICS Two more paycomics, based on Suckubus and the final part of Chaos sisters, with unique twists! Art by Xgeek, Hsefra and , covers by boxofwant and ! COMMISSIONS Once again pieces from , lovely streams sketches from I colored, art from based on this story, I trusted for a ref pic with an outfit design (with gorgeous result), I finally scored art from taboolicious during a stream, some appropriate YCH from with past and present characters, and finally what would be an artist spotlight with a furry cameo, from ToasT: ANIMATION I got into cutout animation! Thank you all artists who trusted with their art, including , , , and . I love how jiggly my gallery became: Even full pages: If you want
Eclipse extension project?
So, this is the worst case scenario where the new UI is terrible, the admins probably won't do anything for years, and there's no convenient alternative to post long galleries. It got to the point I'm considering hiring someone to make a Firefox extension and improve it. Namely: - zoom and uncrop pic when hovering over the thumbnails instead of dimming them - default to "all" when checking the "watch" page - white background on text - remove a deviation with del key, either from the deviation page or the gallery with the mouse over them Please post more possible improvements in the comments, and contact if you are fluent in HTML or have someone to recommend.
Tutorial: more natural fit with Dforce
We've all been there (well, if you're all doing fetish 3D comics with giant boobies), for some reason the figures aren't designed to accomodate some body shapes:
Daz Studio now has a physics engine to simulate clothes, which offers an unexpected solution to this. First, select the prop you need to fit, and turn it into a dynamic surface:
Optional
to only simulate a part of the surface, Create/ New Dforce Modifier Weight Node and in Tool settings/ Node Weight Map Brush add the Influence Weights map and remove the area that shouldn't be simulated (paint with alt key held):
Note that all the surfaces of this prop are converted. If you don't
Featured in Groups
© 2017 - 2024 Erismanor
Comments2
Join the community to add your comment. Already a deviant? Log In
Thank you very much, that helps a lot!
